

Graffiti Drop Shadow Tutorial for Beginners – Master the Basics
If you’ve ever looked at a graffiti piece and wondered how the drop shadow makes the letters pop off the wall, you're not alone. Drop shadow is one of the most common effects in graffiti lettering, yet many artists—especially beginners—struggle to get it right. In this graffiti drop shadow tutorial, we’re breaking down how to do drop shadow for your throwies, graffiti pieces, and even complex wildstyle letters. Whether you're sketching in a blackbook or painting on a wall, these techniques will help you master the fundamentals and take your lettering to the next level.
Why Drop Shadow Matters in Graffiti
Drop shadow isn’t just about aesthetics—it’s a key visual technique that gives your letters depth, dimension, and separation from the background. It creates the illusion that your letters are floating above the surface. But if the shadow is inconsistent or incorrectly placed, the whole piece can look off. That’s why understanding the principles behind drop shadows is crucial for every graffiti writer.
The Three Core Shapes Behind All Letters
Before diving into lettering, the tutorial begins with a foundational concept: all graffiti letters are constructed from three basic shapes—the square, the circle, and the triangle. Once you learn to apply drop shadow to these three forms, you’ll be able to apply it to any graffiti letter, no matter how complex.
Step-by-Step: How to Do Drop Shadow in Graffiti
1. Choose a Light Source
In most graffiti, artists choose a light source from the top right, but it can be from any angle. Your shadow will always be cast in the opposite direction. Its important that we apply this light source as consistently as possible. When painting pieces on walls, this becomes a little trickier, so people are often willing to let small issues slide. However, on paper, mistakes with drop shadows and inconsistent lights are not acceptable. Inconsistent lighting will cause problems with both the shadows in later steps, and your highlights as well. In this example, our light source is in the top right hand side, shooting light down and to the left.
2. Draw the Light Angle

Once we have our light source, we can draw the angle the light will shine in. This angle determines how far the shadow travels down and out from each point of your letter or shape. The length and angle of this line is important as we’ll apply that exact length and angle uniformly to the whole piece. Having this uniform approach will keep our shadow’s proportions identical to the letters, and prevent the shadow from taking on wildly different shapes than the letters. When this happens, it’s possible for our shadows to actually contradict our light source, causing us to have shadows in areas we shouldn’t.
3. Apply the Shadow to Each Vertex
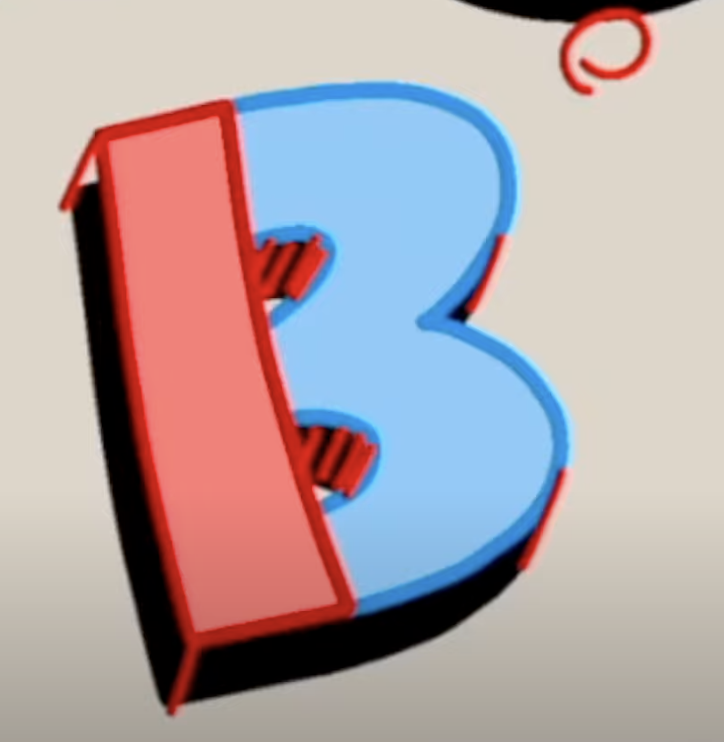
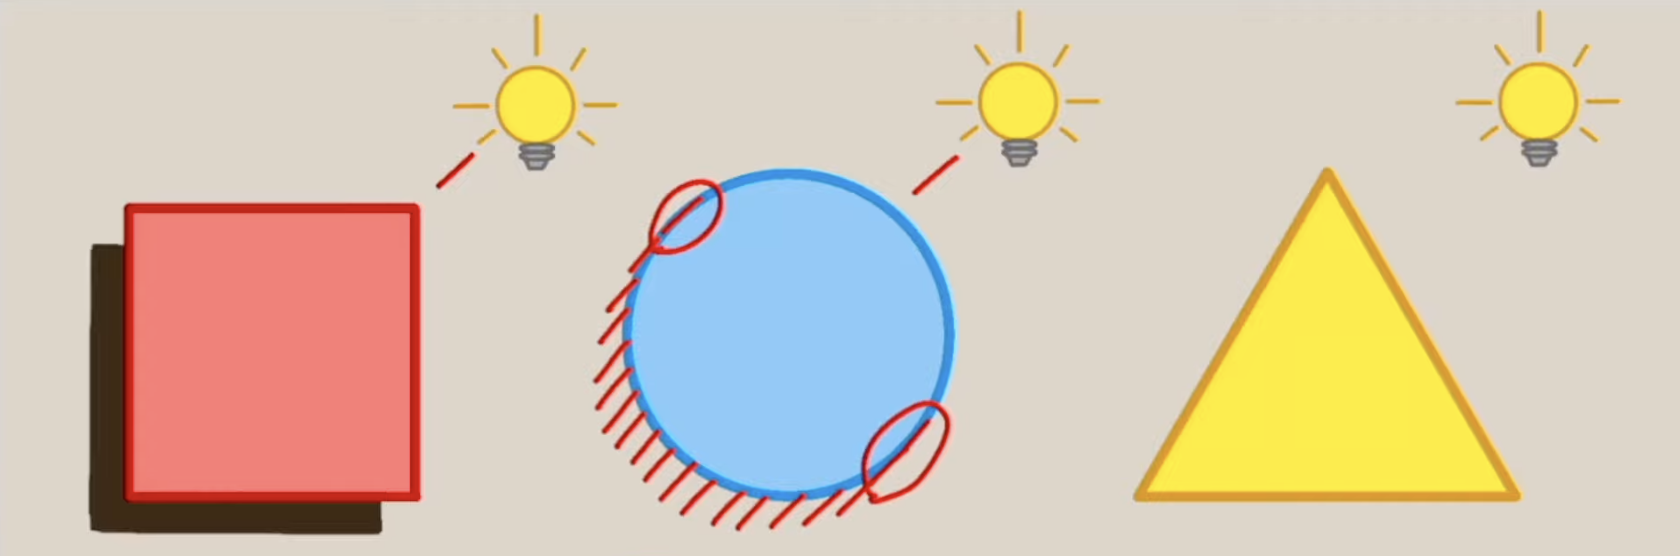
For sharp-edged shapes (like squares or triangles), you can apply the shadow by copying the light angle from each corner. For curved shapes (like circles), you’ll need to use reference lines that are drawn around the outer edge of the circle to find out where our shadow should start and end. As seen in the example, you can see our lines circled in red begin to go behind the circle, this tells us where to start and end the shadow.
4. Connect the Dots and Fill It In
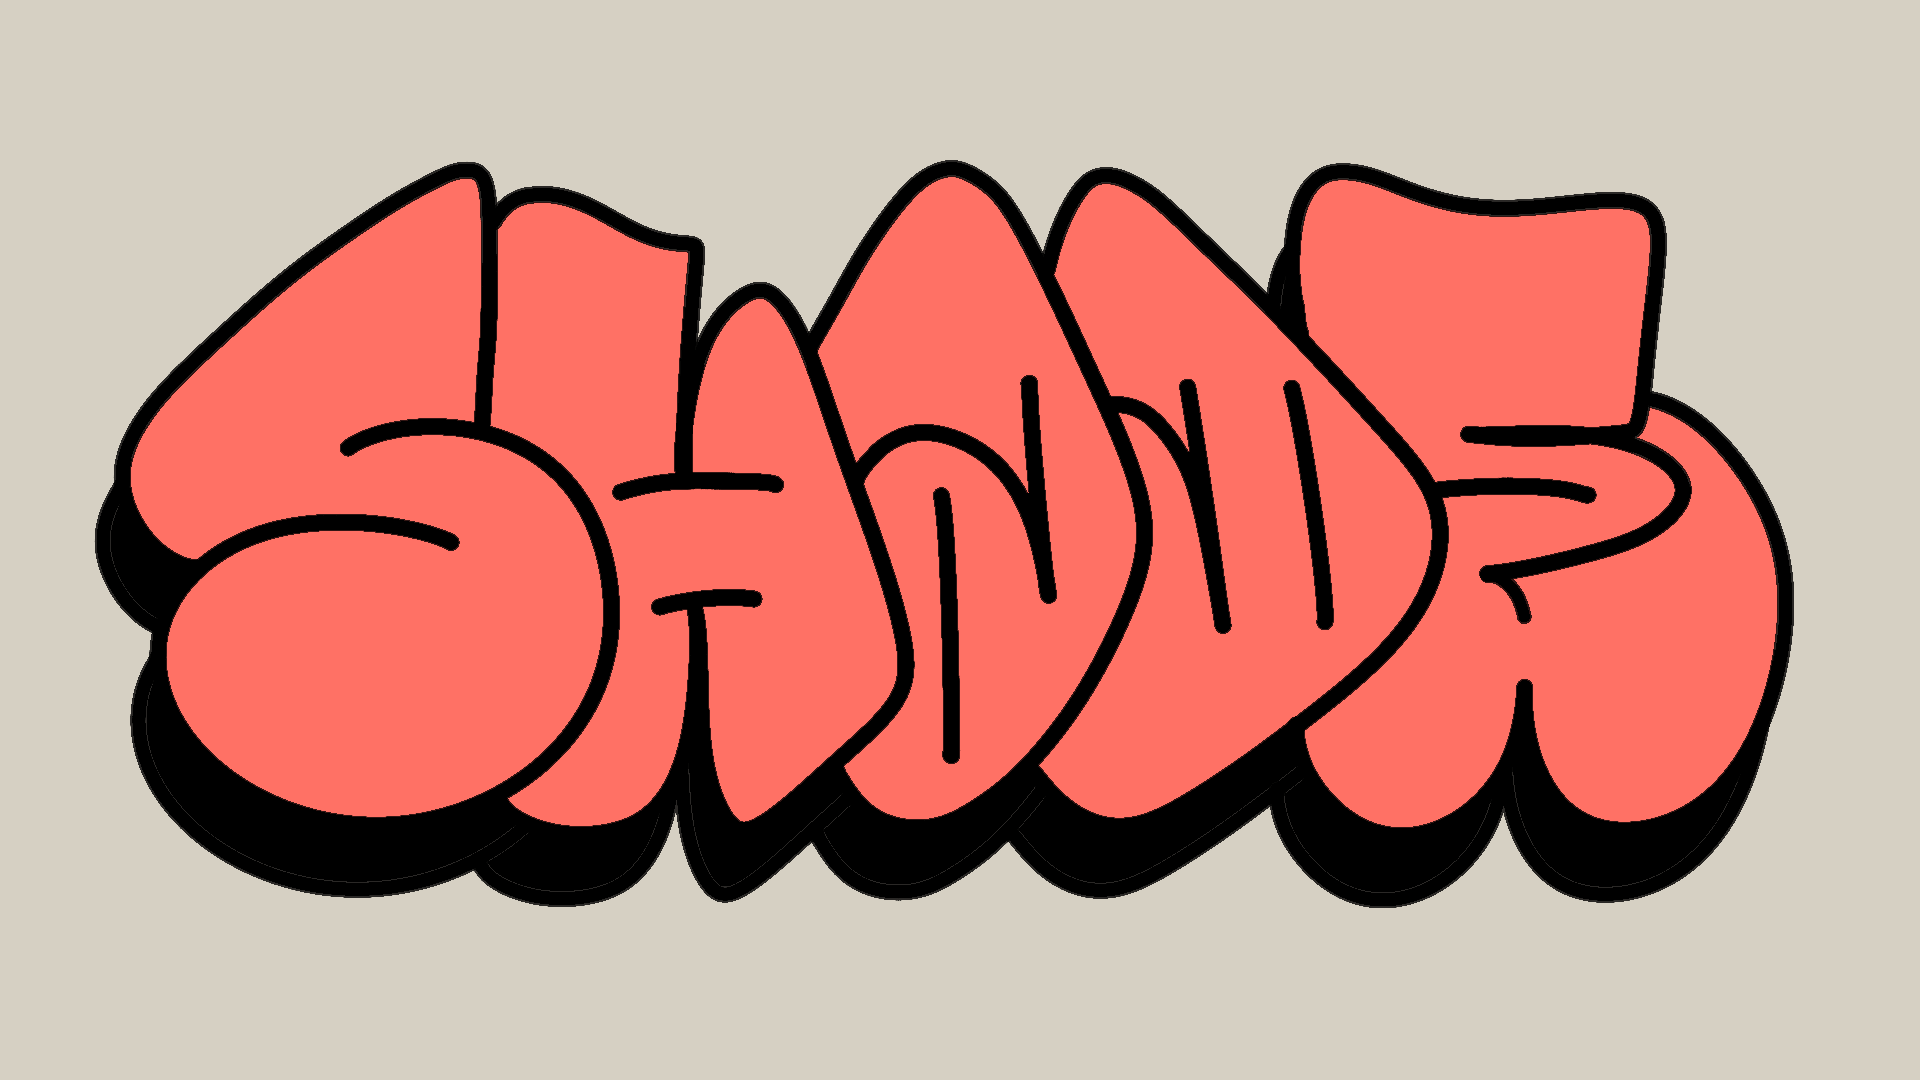

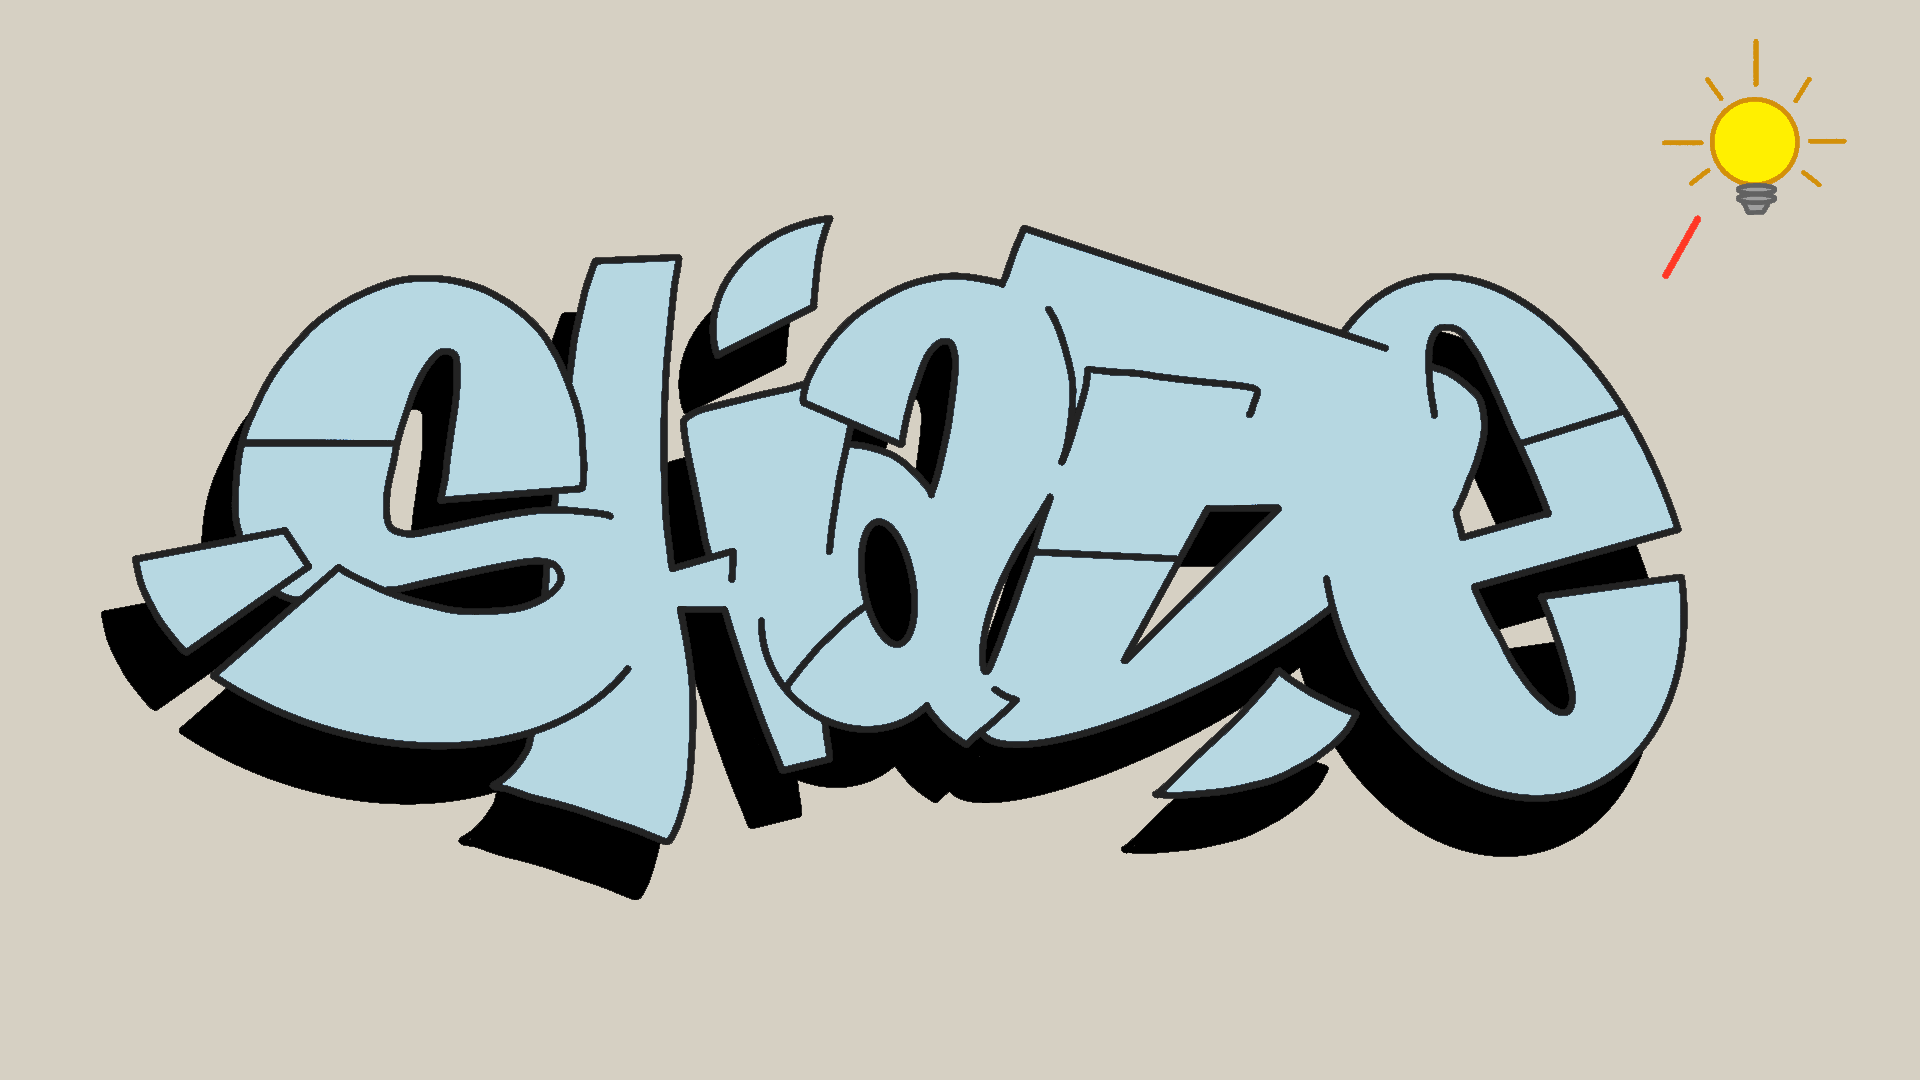
Once the endpoints of the shadow lines are established, connect them to create the full drop shadow. Then, fill it in with black or a dark tone to complete the effect. Its that simple, and no matter how complex your letters get that simple process will always work. This piece is by no means a wild style or anything crazy, but it still illustrates that the same exact technique still works beyond basic shapes.
Download Bonus Materials + Learn More
To reinforce what you’ve learned, there’s a downloadable resource linked here. This includes extra examples and diagrams to help you visualize drop shadows in different scenarios.
If you're serious about improving your graffiti skills and learning more than just effects, check out the Ultimate Graffiti Guide Book mentioned in the video. It’s packed with hundreds of visuals and in-depth breakdowns that cover not only technique but also graffiti ethics, structure, and creative growth. Digital and physical copies are available.
Grab a digital copy here: Ultimate Graffiti Guide Book Part 1: Fundamentals and use code : July4th for 15% off.